Appearance
Pinia入门🍍
这篇文章的基础用法写的不错: https://blog.csdn.net/weixin_46873254/article/details/123304854
pinia官方文档: https://pinia.vuejs.org/zh/getting-started.html
1. 安装
按照文档的步骤安装,不再赘述。
pinia比起vuex,去掉了被认为是冗余的mutation, 保留 state, getter 和 action。
这三个部分类似于vue中的 data, computed 和 method.
2. 创建store
2.1 main.ts 中创建实例
可以直接在main创建实例:
ts
import { createApp } from "vue";
import App from "./App.vue";
// 引入pinia
import { createPinia } from "pinia";

// 创建 Pinia 实例
const pinia = createPinia();

const app = createApp(App);

// 挂载到 Vue 根实例
app.use(pinia);

app.mount("#app");2.2 独立文件夹管理store
也可以在自定义文件下创建实例,再挂载到App:
首先,在src下创建store文件夹以及index.ts:
ts
import { createPinia } from "pinia"; // 创建

const store = createPinia()

export { store } // 导出然后挂载到main.ts:
ts
import { createApp } from "vue";
import App from "./App.vue";
import { store } from './pinia'  // 引用刚刚创建的store实例

const app = createApp(App);

app.use(store); // 使用
app.mount("#app");接着在src/store/下创建文件夹module, 然后就可以写具体的子容器,如创建一个user.ts,全局存放用户相关的data:
ts
/**
 * 一般在容器中做这4件事
 *    1. 定义容器并导出
 *    2. 使用容器中的state
 *    3. 修改容器中的state
 *    4. 使用容器中的action
 */
import { defineStore } from "pinia";

/**
 * 1. 定义容器并导出
 * 参数一: 容器ID, 唯一, 将来 Pinia 会把所有的容器挂载到根容器
 * 参数二: 选项对象
 * 返回值: 函数, 调用的时候要空参调用, 返回容器实例
 */
export const useUserStore = defineStore('user', {
  /**
   * 类似组件的 data, 用于存储全局的的状态
   * 注意:
   *    1.必须是函数, 为了在服务端渲染的时候避免交叉请求导致的数据交叉污染
   *    2.必须是箭头函数, 为了更好的 TS 类型推导
   */
  state: () => {
      return {
          name: 'Nic',
          age: 22,
        points: 0,
          text:''
      }
  },
  /**
   * 类似组件的 computed, 用来封装计算属性, 具有缓存特性
   */
  getters: {
      pointsAddTen(state) {
          return state.points +10
      }
  },
  /**
   * 类似组件的 methods, 封装业务逻辑, 修改state
   * 注意: 里面的函数不能定义成箭头函数(函数体中会用到this)
   */
  actions: {
    increment(num: number) {
      this.points+= num
      const p = this.points

          switch (true) {
              case p >= 100 && p < 400:
                  this.text = '功德小增!'
                  break;
              case p >= 400 && p < 800:
                  this.text = '功德满满!'
                  break;
              case p >= 800 && p < 1000:
                  this.text = '功德上乘!'
                  break;
              case p >=1000:
                  this.text = '功德圆满!'
                  break;
              default:
                  break;
          }
      },
  }
})创建好,就可以调用了
3. 调用
3.1 简单调用
js
<script setup lang="ts">
import { useUserStore } from '~/pinia/modules/user.js'

const user = useUserStore()

console.log(user.name);

</script>3.2 访问及修改state
使用storeToRefs,响应式结构state:
js
<script setup lang="ts">
import { useUserStore } from '~/pinia/modules/user.js'
import { storeToRefs } from 'pinia';  // 👈就是它

const user = useUserStore()
const {name, text, age, points} = storeToRefs(user) // 解构赋值

console.log(name);  // 直接使用

const addPoints = () => {
  points.value += 10;

	//或者 没有结构赋值的话
	// user.points += 10;
}

</script>3.3 $patch 批量修改
多个数据修改,建议使用 $patch 批量更新
不单纯是写法优化,还有性能的优化
不涉及数组的patch:
js
  const handleClick = () => {
    // 哪些数据项需要修改就写数据项
    user.$patch({
      name: 'Nic',
      age: 13,
    })
}数组的patch,接受一个函数:
js
store.$patch((state) => {
  state.items.push({ name: 'shoes', quantity: 1 })
  state.hasChanged = true
})3.4 订阅 state
类似于 Vuex 的 subscribe 方法,你可以通过 store 的 $subscribe() 方法侦听 state 及其变化。比起普通的 watch(),使用 $subscribe() 的好处是 subscriptions 在 patch 后只触发一次 (例如,当使用上面的函数版本时)。
ts
user.$subscribe((mutation, state) => {
  // import { MutationType } from 'pinia'
  mutation.type // 'direct' | 'patch object' | 'patch function'
  // 和 cartStore.$id 一样
  mutation.storeId // 'user'
  // 只有 mutation.type === 'patch object'的情况下才可用
  mutation.events // 传递给 cartStore.$patch() 的补丁对象。

  // 每当状态发生变化时,将整个 state 持久化到本地存储。
  localStorage.setItem('user', JSON.stringify(state))
  console.log(points.value);
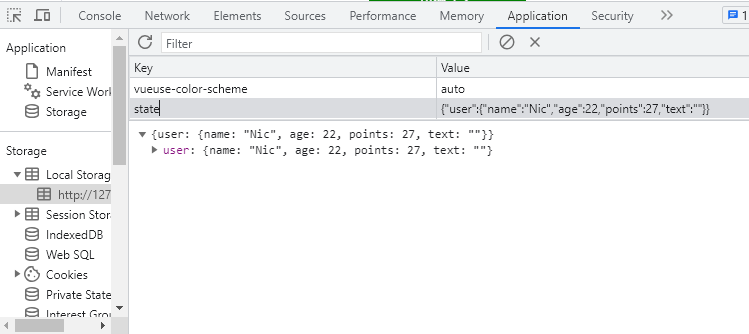
})也可以用watch监听state,一旦改变就存到本地:
ts
import { useUserStore } from '~/pinia/modules/user.js'
import { storeToRefs } from 'pinia';
import { store } from '~/pinia'
import { watch } from 'vue'


const user = useUserStore()
const { name, text, age, points } = storeToRefs(user)

watch(
  store.state,
  () => {
    // 每当状态发生变化时,将整个 state 持久化到本地存储。
    localStorage.setItem('state', JSON.stringify(store.state.value))
  },
  { deep: true }
)
3.5 总结
ts
const handleChangeState = (() → {
  // 方式一:最简单的方式就是这样
  user.points++
  user.name='hello'

  // 方式二:如果需要修改多个数据,建议使用$patch 批量更新
  user.$patch({
	  points: user.count+1,
	  name:'hello',
	  arr:[..user.arr,4]
  })

  // 方式三:更好的批量更新的方式:$patch一个函数
  user.$patch(state → {
	  state.points+
	  state.name ='hello'
	  state.arr.push(4)
  })

  //方式四:逻辑比较多的时候可以封装到 actions 做处理
	  user.changeState(10)
}4. actions
复杂的逻辑,可以在action中实现。
**注意: **
actions 中的函数, 不能定义成箭头函数 因为箭头函数中没有this, 在运行时, 会向外部的作用域找
user.ts
ts
import { defineStore } from "pinia";

export const useUserStore = defineStore('user', {
  state: () => {
		return {
			name: 'Nic',
			age: 22,
			points: 0,
			text:''
		}
  },
  getters: {
  },
  /**
   * 类似组件的 methods, 封装业务逻辑, 修改state
   * 注意: 里面的函数不能定义成箭头函数(函数体中会用到this)
   */
  actions: {
    increment(num: number) {
      this.points+= num
      const p = this.points

        switch (true) {
            case p >= 100 && p < 400:
                this.text = '功德小增!'
                break;
            case p >= 400 && p < 800:
                this.text = '功德满满!'
                break;
            case p >= 800 && p < 1000:
                this.text = '功德上乘!'
                break;
            case p >=1000:
                this.text = '功德圆满!'
                break;
            default:
                break;
        }
      },
  }
})业务代码:
ts
const handleClick = () => {
  user.increment(points);
}